Powered by Blogger.

{Mini Tutorial} Let the Tape be my guide

I've read about painter's tape used as a quilting guide and got a chance to try it out today. The thing is the painter's tape which available is not of good quality and I don't have a masking tape. I have cello tape. That should do, right?

Now if you use this tape, don't press it so much, as it works only as guide. You don't want any residue sticking across your quilt, right?


Remember the edge of the foot should fall exactly in the edge of the tape
Don't put the foot on the tape
because it's slippery and the foot won't glide. I did that in the beginning 
and had to struggle a bit

So, I finished quilting it quite fast . I am not very good in eye-balling my stitch, so this tape is really my savior.

Now I want to do that wavy curvy stitch for the border
and here's what I do

1. I cut the used tape (it's got batting all over it so it's not sticky => easy to cut) according to what I want to do


2. Change my foot to darning foot {R foot in my Husqvarna Viking machine}


3. Set the machine for Free Motion Floating and I'm good to go


There you can see the wavy curvy line ^_^


here's another idea


What do you think? 

I recently found that standing and quilting is much more comfortable. It's easier to maneuver the quilt and easier on my shoulder too. That way, I can see my stitches better too. Well, I get a bit tired standing but then you can always take a break in between.  


Now the quilt is ready for binding


Oh I love the corner part.

Well, I hope you enjoy my mini tutorial ^_^
Remember, there is no right or wrong in quilting

Until then

Happy Quilting


Nice and Bright Quilted iPad Sleeves

I love the process of making this sleeve


The moment she said she wanted something in fuchsia, orange and blue
I started pulling fabrics from my stash
you won't believe it, Indian fabrics have a LOT of shades of fuchsia


I was like "which one is more fuchsia, should I go for the darker one or the lighter one"
she wanted something like the coasters


Once I decided on the fuchsia and orange batik, I had to pull out blue fabrics
again it was a battle for me
And I found this solid blue cotton hidden in my solid stash
just the right one!


I like to hand sew my binding
unless it's a big quilt ^o^
I always leave the hand sewing part at night
when I can quietly sew and watch my favorite drama


ah now, it's done and delivered
it's a good feeling to think that I - who live in the corner of North East India - made something for someone so far away


"if there's a will, there's a way"
Now I truly believe it! 

=============================


This iPad sleeves is SOLD but I still  have the fabrics.
If you need one, simply drop me a line in my SHOP 

I tried making cover for my button jar
not as good as I wanted it to be but that's fine ^^
(my friend Agnes said "Now even your jar is wearing a kaffiyeh" LOL")


and I made a keys cover from the little remnants. 
Someone is going to have that cover ^^. I hope she will like it.

Until then

Happy Quilting


{SWAP} having fun with mug rug

Second Fun is I joined this mug rug swap in Desi Quilters.
We have to make 2 mug rugs for our secret partner
Ah, it's been a while since I do swapping

I have this postage stamp blocks, so I decided to make from those blocks.
I wanted to make something modern 
and here's the result:

This was inspired by Suzuko Koseki book. I love how simplicity can be really pretty. The red riding hood was a last min addition. While I was straightening the block, I saw this Red riding hood strip peeking from my scrap bin and voila, it gives a cute addition, doesn't it?


I have a little left of the pink roses fabric and I thought it would be nice as a backing and binding.
Quilt it using straight lines 1/2" apart. 

Second mug rug, I was thinking of doing the same, then I saw the star strips from the wallet I'm making, so why not make a star roof?  


My son said "Hello Kitty in the house" (see that hello kitty in the second row?)
The grey fabrics are left over binding strips from my wallets.


so there they are
Who ever receive it, I hope it will bring some cheers in their house ^_^

One more thing
The pink bunny and cat wallet is done and delivered 


but it's still available for custom order in the SHOP

Now, I'm back on doing few custom orders due this week. 

...All I wanna do is have some fun...
...I got the feeling I'm not the only one...

Happy Quilting


Hello December

Time flies when you're having fun
This is one fun I had in the past week

Mini table topper made for Desi Quilter's Spread Some Cheers which sponsored by The Square Inch. This program is to help raise fund for Swanthana, a home for physically and mentally challenged girls based in Bangelore. If you'd like to participate, you can read more further information HERE

I sent this cheerful table topper to sell at the school fairs and the proceed will go to the Home. Hopefully it will fetch a good sum. 


I made this based on Quilting in the rain's Book "Quilt as you go made modern
It's very addictive. I plan to do the quilt along, but I will take my time. It's going to be my fun projects. 


You know when you're doing the same thing all the time and you need to recharge by doing something fun. 

I tried different decorative stitches here and it was a lot of fun!!


 I always love Rita of Red Pepper Quilt's binding and how fab it is. If you notice, my project always take a long time to complete, that's because I took a long time to decide what backing and what binding will work best. Sometimes I even mulling over what quilting line should I do. 
Especially for small quilts, I am extra careful in choosing my fabric combo.

 What about you? What fun did you have?

Until then,

Happy quilting


Simple Guide - taking good photos for your online shop


When you are selling online, a GOOD, professional looking photography is a MUST. I've done a lot of reading {and I still do} on how to take a good product photography.

I follow these few simple guides:

1.Natural Light is the BEST

But not direct light. Which means, take your photos in the room which doesn't get direct sunlight. I have a small balcony adjacent to my room, which is has a good natural light. The balcony is facing North. The best time is before 11 am and around 3-4 pm. And you ask WHY? because indirect natural light will give you the best color of your product.


This is unedited, taken under indirect natural light
My sewing room has natural light most of the time, but it's facing East, so it gets direct light most of the time. When I took photo in my sewing room, the result is either too bright or too dark. 


Never take your photos at night, even with sufficient light

I took this photo at night with a poor background and I had a tough time editing it.


2. NO FLASH

NEVER use flash light. The best picture is the one which doesn't need much of editing. Whether you take with DSLR camera, pocket camera or your mobile camera. Flash will a harsh shadow on your product and you will have a hard time editing it. Especially if you are not expert in it. I don't know how to use photoshop, I love using picasa or photoscape which is easier.

with flash
without flash


3. BACKGROUND


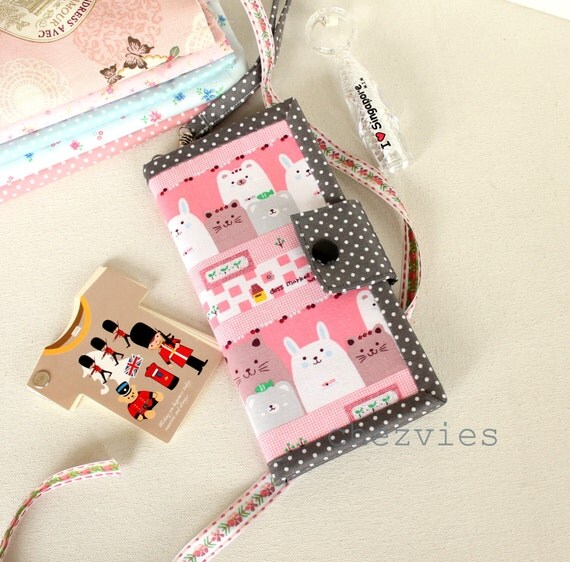
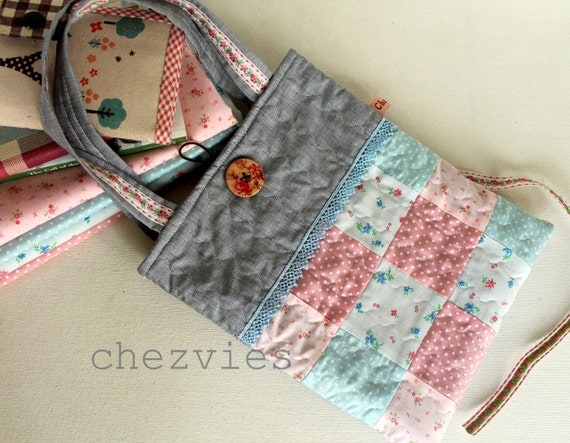
Background is very important. Remember your product is the CENTER of attention. So, to many thing in the background will distract the buyer. Use minimal prop which can enhance your product. If your are not sure what prop you should use, white background always works best.

I'm using this inexpensive canvas board as my background. I put it on top of my trunk, and cover it with tablecloth when I don't need it. Since it's very dusty here I make sure to cover it.


As much as you can, try to convey the uniqueness of your product. Less is always better. I usually like to browse craft magazines and pinterest to get ideas  on how to use the prop.


Make sure the background is less busy or less colorful than your product. The FOCUS is on your product, not the green leaves or the Chrystal vase behind the product. 

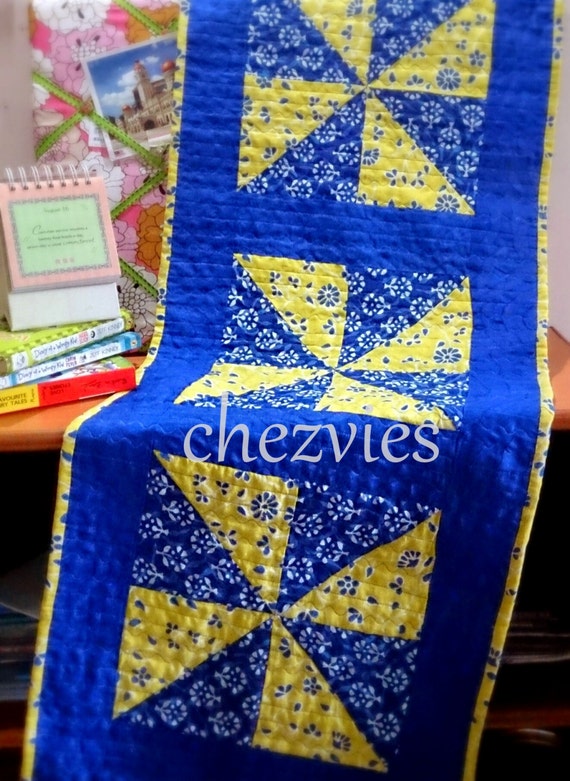
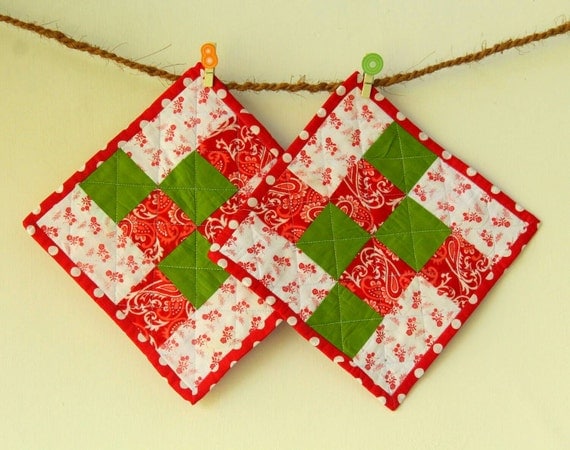
Look at this photo, the idea was to show that you can use the mat for the chrystal vase. But the vase is too big that you cannot see the design of the mat


Compare to this one
The simple prop makes the mats pop out


4. Camera Setting 

It's always best to use camera with higher  resolution. At least 8 mega pixel and above for Android Phone. For iPhone 5 mp is sufficient to give an editable and clear picture. Why? because you need to crop your picture.  If you are using lower resolution camera, when you crop it, the picture will not give you a clear image and sometimes it breaks/grainy

The size of an image taken at different resolutions
Photo courtesy Morguefile
You can read more about Digital Camera Resolution HERE

If you have DSLR but not very familiar with it, go with the automatic setting. In my Canon its the P sign. When I am in a hurry, that's what I do. If I am using mobile camera I always turn OFF the flash. 

Always click many photos, try different angles, and different props. For one product I took around 15-20 pics.


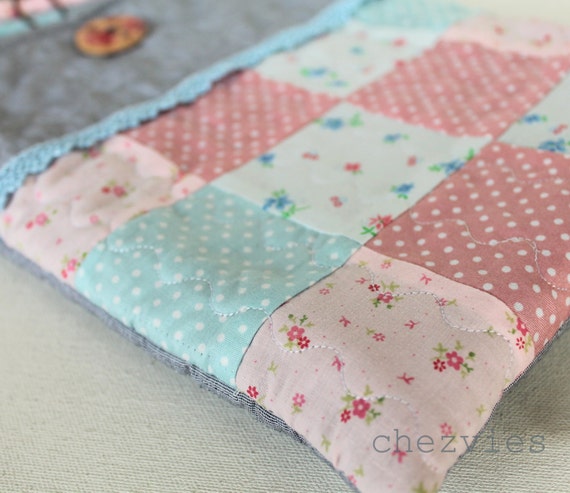
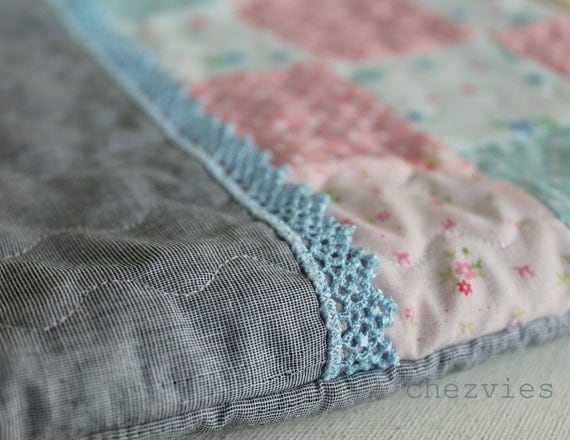
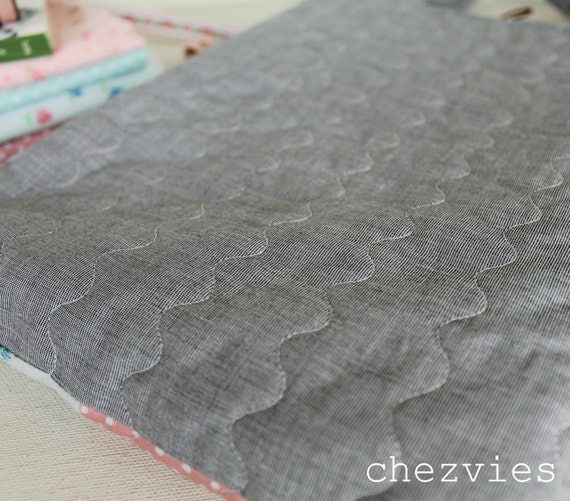
Of course DSLR camera gives a better result, especially for close up pictures 


and it also can capture more natural color of the product. Especially for my fabric shop I try to always use my DSLR


But
some photos in my handmade ETSY shop was taken using my mobile camera. If the light is good, sometimes it gives a good natural color which doesn't need much editing.

It's as simple as that. All you need is an extra time and patience. 

I'm not an expert and I'm still learning. If you want to know more
Etsy has a good guide in its blog from Beginner's Guide to Smartphone Photography .You can check Etsy BLOG for complete list.


Happy Clicking


Wish you happily ever after


Love and marriage, love and marriage
Go together like a horse and carriage
This I tell you brother
You can't have one without the other


Love and marriage, love and marriage
It's an institute you can't disparage
Ask the local gentry 
And they will say it's elementary


Try, try, try to separate them
It's an illusion 
Try, try, try, and you will only come
To this conclusion


Love and marriage, love and marriage
Go together like a horse and carriage
Dad was told by mother
You can't have one without the other
{Frank Sinatra's Love and Marriage}
❤❤❤
Made this wallet as a gift for my fave cousin-in-law who's getting married next Sunday
Congratulations to each of you on finding someone so special to lean on, laugh with and love always
With warmest wishes and love, today and always

❤❤❤


Shabby Chic love

I always love shabby chic style
with soft pastel colors and ribbons

After making my iPad sleeve, I was in the mood of making another one with pastel colors and maybe a little handle, which you can carry around and can fit in your iPad with smart cover, wallet and an iPhone

and here it is: 


I used fleece and as batting. Fleece is nice to quilt since it doesn't move, so for small projects I don't need to pin them


again I quilted it with my fave decorative stitch
this time I lengthen the stitch a little bit


The grey fabric was from my fave Bombay dyeing. It's linen cotton for men's shirt. 
It's difficult to get a linen here, so when I see one I pick up. Though it's a bit expensive but it's worth it


the back side is plain grey and I love how the quilting turned out

simplicity is always the best, imho ^_^

This bag is listed in my Etsy Shop and is ready to ship


Until then,


I need a new iPad sleeve

I was cutting off jelly rolls for the shop and looking at my design wall. I made this test block a couple days ago and just put it up in my design wall


I was thinking of making mug rug with it. But then, I need an iPad sleeve. My iPad has a smart cover but it's tearing off and it's not even 6 months old =,=.
I bought it in Changi Airport for $35 >,<


So, I put my jellyrolls away and start working on it and after an hour my iPad has a new sleeve. Yay!


It fits snugly and I love the grey combination . Quilted using my favorite stitch. 

I used double batting - outer and lining to give more protection.


I still have the fabrics and I think I'll put it up in my shop for custom order.

I realize one thing:  I love working on patchwork with small squares 2.5" - 3" and HST from charm piece

Ah, I still have few WIPs that I plan to finish before the end of this month {IF I'm not distracted} . One of them is this placemat.It will be a set of 4 and I almost finish with the quilting.


and this pink bunny n cat wallet for my SIL's niece


and here's the sneak peek of the jellyrolls 


With one family wedding coming up and the little R has his monthly assessment, I hope I can finish at least those two.

Until then

Happy Quilting


Shop Link


Latest Video