Powered by Blogger.

Lots of zippy pouches


The birthday party went off well last Sunday and even the grown ups wanted the zippy pouch that I made to fill in the goody bags.


It was on impulse that I decides to make these zippies. I asked the birthday boy to choose the fabrics and he did.


The big bro even wanted to me to show him the sewing process. Later on I found out that he bragged abit about his mom sewing the pouch to his friends. How sweet is that! My best compliment!

A friend saw my post and wanted for her daughters, hence the pink series ^_^


Some of these pouches already up the my ETSY SHOP .
Go and grab few now, it comes in a Gift Pack of 3 

I really enjoy making pouches. In fact I always do. 


I have done few more of this pouches yesterday. 

and now, I better back to my quilt ...


pssst! don't you like all those fancy picture editor in your android? Well, I am addicted to them. recently found this pipcamera which is awesome!

until then

Happy Sewing


Everyone needs Family Passport Wallet

Oh yes, I know how it feels carrying 4 passports, residential permit, marriage certificate, exit permit plus my PIO card while travelling. Not to mentions the tickets - several of them since we always have to have several stop overs >_<.  The options I have are store bought leather passport wallet or the one from the travel agents, which barely survived one trip.

So, why not make one? Yes..so, benchmarking from the store bought wallet, here's my straight and simple {and cute} Family Passport Wallet


This wallet can hold up to 6 passport and spacious long pocket on the sides to keep your travel documents and small change. 


It has a small swivel hook for your luggage keys (yay)

I used Indian cotton fabric and heavy interface. It's sturdy and  a wide velcro closure will keep everything in place. 

Another one I made was using this cute hot air balloon over the Eiffel Tower fabric. Bought them from this shop during my trip back home last July. 


when folded


I love that little hexagon there ^_^

This wallet will make a perfect holiday gift. 
Both the wallets are listed in my ETSY SHOP
Visit the shop or my Facebook Page if you want custom order


Until then
Happy Sewing


Yes, I love shot cotton

Shot cotton a.k.a handlloom cotton is perfect for any projects. I love making tunics, or quilt or anything. I have few listed in  the shop and few more is already waiting to list. 


it's simply gorgeous! it comes in prints too


simply gorgeous!!

This is what I made using shot cotton fabric. I did this for a challenge in Desi Quilters group on FB

Simple hourglass block. The fabrics was gifted by Sudha of Madras Motifs when she visited me early this year.


Don't you love this color??

here's the detail again.

I made few more in the past which you can see in my Facebook Page.

Until then


B for Boy or Blue

This is another late post. 
I made this quilt last  September for my MIL's friend. She wanted something BLUE for her grandson. And you know there are a whole lot of shades of blues.

 See what I mean???

She simply said "I want something blue for my Grandson, he's 13 years old" . hmmm...As usual, deciding the block and pattern arrangements is the most difficult part for me. I made few fabric selections and few test blocks, laid them on the floor, clicking endless pictures. Picking another set of blues, cutting and repeating until I get that "AHA" feeling.

I saved you from viewing my "WIP" photos, and here what I came up with:

I wanted something simple that has a BLUE look about it. Using a square in square block, I put owl prints in the middle and blue and yellows oval dotted prints too. 


 of course a blue dots for the back! Lucky I found this still in stock in my fave fabric shop!


and as usual, decorative quilting ^^

It was a rush work, since she's leaving for the US and will take the quilt with her. I sent her just few days before she left, and she was very thrilled and placed another order, this time it's PINK. Now, that the color that I love ^_^. 

Until then,
Happy Sewing


Vigbyor Tote for a swap

Last August we at Desi Quilter had this Tote'lly Bag Swap. It was kind of mystery swap. We knew whom to send but we didn't know who will be our sender. Plus, each participant posted their mood board as a guidance.

The tough part is to get that 'aha' moments. I have to make tote for Nikhat and she posted this mood board:


The moment I saw her board, rainbow came to my mind. I browsed a lot of rainbow bags and quilt looking for inspiration but nothing click. I wanted something not too gaudy where she can tote it around. Looked into my fabric stash n settled for my Bali batiks. Using the method of "tour around the world" block I made this tote.

Size: 18" x 16"


Well, once I started sitting in my sewing machine, ideas started flowing. I used what's left to make a little detachable zip pouch {for small change or maybe lipstick ^^}


I quilted it using decorative stitch which I love to do so much :D


hmm look at the vibrant colors of the batik again. I simply love these bundles!


Now, DH cousin and aunt wanted the same thing ..hmm guess everyone loves a huge tote. 

Until then...
 Happy Sewing


My bundle of joy and a bag

And no, it's not a baby. It's just my favorite Indian  fabrics. They came in various bright colours imaginable. When I got my new stocks I have all kind of ideas running around my head.

Fabrics available  at www.chezviessupplies.etsy.com

And since I was leaving for Indonesia to visit my Mom, I knew I had to make one bag or two. 

This one I made from tutorial in one Japanese craft book. You know what, if you simply looked at the pictures and not intimidated by the Japanese alphabets, you can easily follow the tutorial :D . 


I added 2 swivel hooks on the inner side, to anchor whatever pouches I carry. 


so, there you go again.


Now, I need to make another one, since my dear sister has "confiscated" this one. Her words not mine ;)

Let me know if you want one, I'll be happy to do custom order for you ^_^.

Until then, Happy Sewing


DQ Sunny Bee - Blue and Yellow Flower Marble Star Tutorial

Hello everyone..

I've been wanting to make this blue and yellow combination since I saw one wall design in one restaurant here in my town. Sunny Bee is a perfect time to make my dream block into reality. It's pretty simple one. Since I'm not very good with words, I took few number of pictures which I hope will be helpful.  This is similar to my QAL's in Desi Quilters, but instead of using flying geese method I used  5" squares and 4.5" squares. 

Let's do it...

WHat you need:
1. Solid white poplin cotton
2. Navy blue floral cotton
3. Yellow floral cotton

I'd love poplin kind of cotton which is easily available in India. 

A.  Cut the fabric according to the pictures:

 1. White Poplin - 4 (5" x5") 

           2. White Poplin - 4 (4.5" x 4.5")

3. Floral Blue - 4 (5"x5")

4. Floral Yellow - 4 (5" x 5")

Finished block size : 16.5" x 16.5"


B. How to do it

1. Make HST but pairing (right side together)  each fabric. whites and blues, whites and yellows, and blues and yellows and shown in the picture. 


2. Mark diagonally and the sew along 1/4" on BOTH SIDES of the LINE


then cut across on the LINE . Sorry I was in a hurry and forgot to take the pic of the cutting piece :(.

3. Once you cut everything, iron them flat and take out the 4" squares SOLID WHITE and arrange them according to the pic below:


sew them together row by row 

and Voila your block is ready


Easy peasy isn't it?

Let me know if you have any questions :)

Happy Quilting


Little Girl Kaftan

This is what I completed last week. I love the simple design and the easy pattern. The yellow trimming is a surprise addition. I was thinking of using solid white but then I saw this yellow fabric peeking out from my cupboard.


Here's the detail of the sleeve

What do you think?


Look!!

My simple little tunics are ready. Yay! It will be available in the SHOP soon. 


I'm thinking of starting children clothes more seriously since I enjoy making them. I started end of last year with dirndl dress, but had to stop in between due to my MIL's illness. For me, family always comes first, no matter what. 
I've got few simple pattern ready and even picked up the fabrics. I just need to be more organized and  focus. Now, I'm working on a few custom orders for local customer and hoping to make a couple set for the shop too. Let's see....

Until then,

Happy Sewing


TUTORIAL : Twisted Infinity Scarf

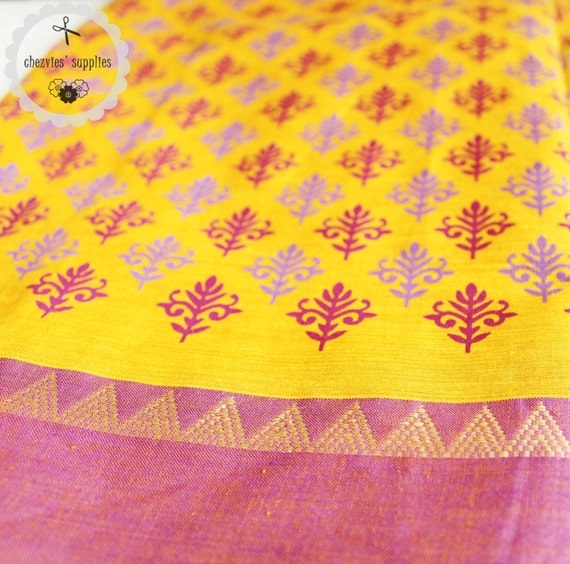
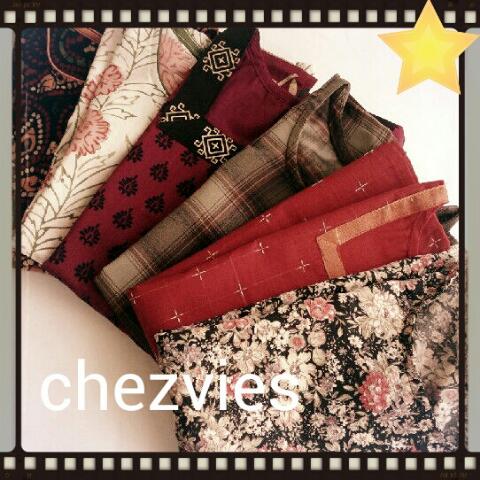
Everyone loves infinity scarf. It's the "grab n go n look fab" kind of accessories. So, recently I've been making my version of infinity scarves. You can use any kind of fabric, cotton, flannel, georgette, crepe, chiffon, etc.  I happened to have these saree blouse fabrics which I got from my MIL. Saree blouse comes with the saree. It's usually less than a meter (80 -90 cm) of fabric which has to be cut off from the main saree. 

I thought of sharing with you how I made my scarves. This is a quick project which make a perfect gift. So, here we go:

What you need:
1. A piece of fabric (depends on how WIDE and LONG of your scarf). and since I'm making from a saree scrap my piece is 80 cm x 115 cm


2. Sewing machine and sewing supplies (matching thread, handsewing needle, etc)

Let's get started:

1. This is my fabric. It's georgette fabric with fancy dots ;). Make sure you straighten your fabric, which means BOTH ENDS have the SAME WIDTH. 


2.  Now, FOLD it once and pin it. ( you can see the selvedges on both sides) .


if you make a longer and wider one, and you'll fold it length wise -  selvedges meet the selvedges. 

3. Sew 0.5" along the pinned side to make a TUBE. 


4. Turn your tube inside out. Lay it flat (iron it if necessary, if you use cotton esp) and now match the open side of the tube by TWISTING the fabric. 


So the SEWN seams will meet the FOLDED sides.


5. Match the middle seam and the sewn seam RIGHT SIDE together and PIN. You can pin all the way around, or like me, I usually put 3 pins at the beginning. 


6. Now start sewing 0.5" along the tube's opening. 


when the opening is getting narrower, you just PUSH the whole SCARF inside the opening. Keep sewing and LEAVE 2"-3" as a turning hole. 

7. You're almost there...now, pull out the fabric and see...you're almost done it ^_^. 


8. Closing the gap with slip stitch using a matching thread. 


And VOILA...wear it as you like ^_^


It's easy peasy, isn't it?

This scarf and a lot more is available at my SHOP.

Until then..

Happy Sewing


Latest Video