Powered by Blogger.
Showing posts with label patchwork bag. Show all posts

After a long time


Hello,
It's been a long time! I hope you are all well, happy, and ready for 2023!

-----------------------------------------------------------------

A small announcement!
I recently made some changes to the blog URL. It's been on my mind to do this, to streamline the website. Now https://www.chezvies.com will be the landing page where people can choose where to go from there. The BLOG URL now changed to https://blog.chezvies.com.
I'm still working on changing the backlinks (that is the links that go to my older posts). It will take a while. But just in case you end up with a BROKEN LINK, simply add BLOG. (with "dot) on the URL address on your browser.

For e.g: https://chezvies.com/2017/04/ will result in a broken link, so simply add BLOG. like this https://BLOG.chezvies.com/2017/04

Please bear with me as I am not very savvy. A lot of things have changed and keep changing and I am hardly able to catch up with these technological changes nowadays!

--------------------------------------------------

A lot has happened in the past few months, like my elder son finally settling into college and enjoying his new college life at the University of Bath in the UK. In the past 2 months, he has been learning a lot, from living a sheltered life to living alone, and making new friends in a new country. Adapting to the new environment. It's not easy, especially for 19 year old but as a parent, we are really proud of him, as he evolves to become an independent human being living and adjusting in the new country. Now we can only pray that God will always protect and guide him.


Also, I finally went home to visit my mom and my sisters in October. I went with my younger son and both of us had a nice time in Indonesia, catching up with family and friends. It was really a much-needed trip, especially for me.


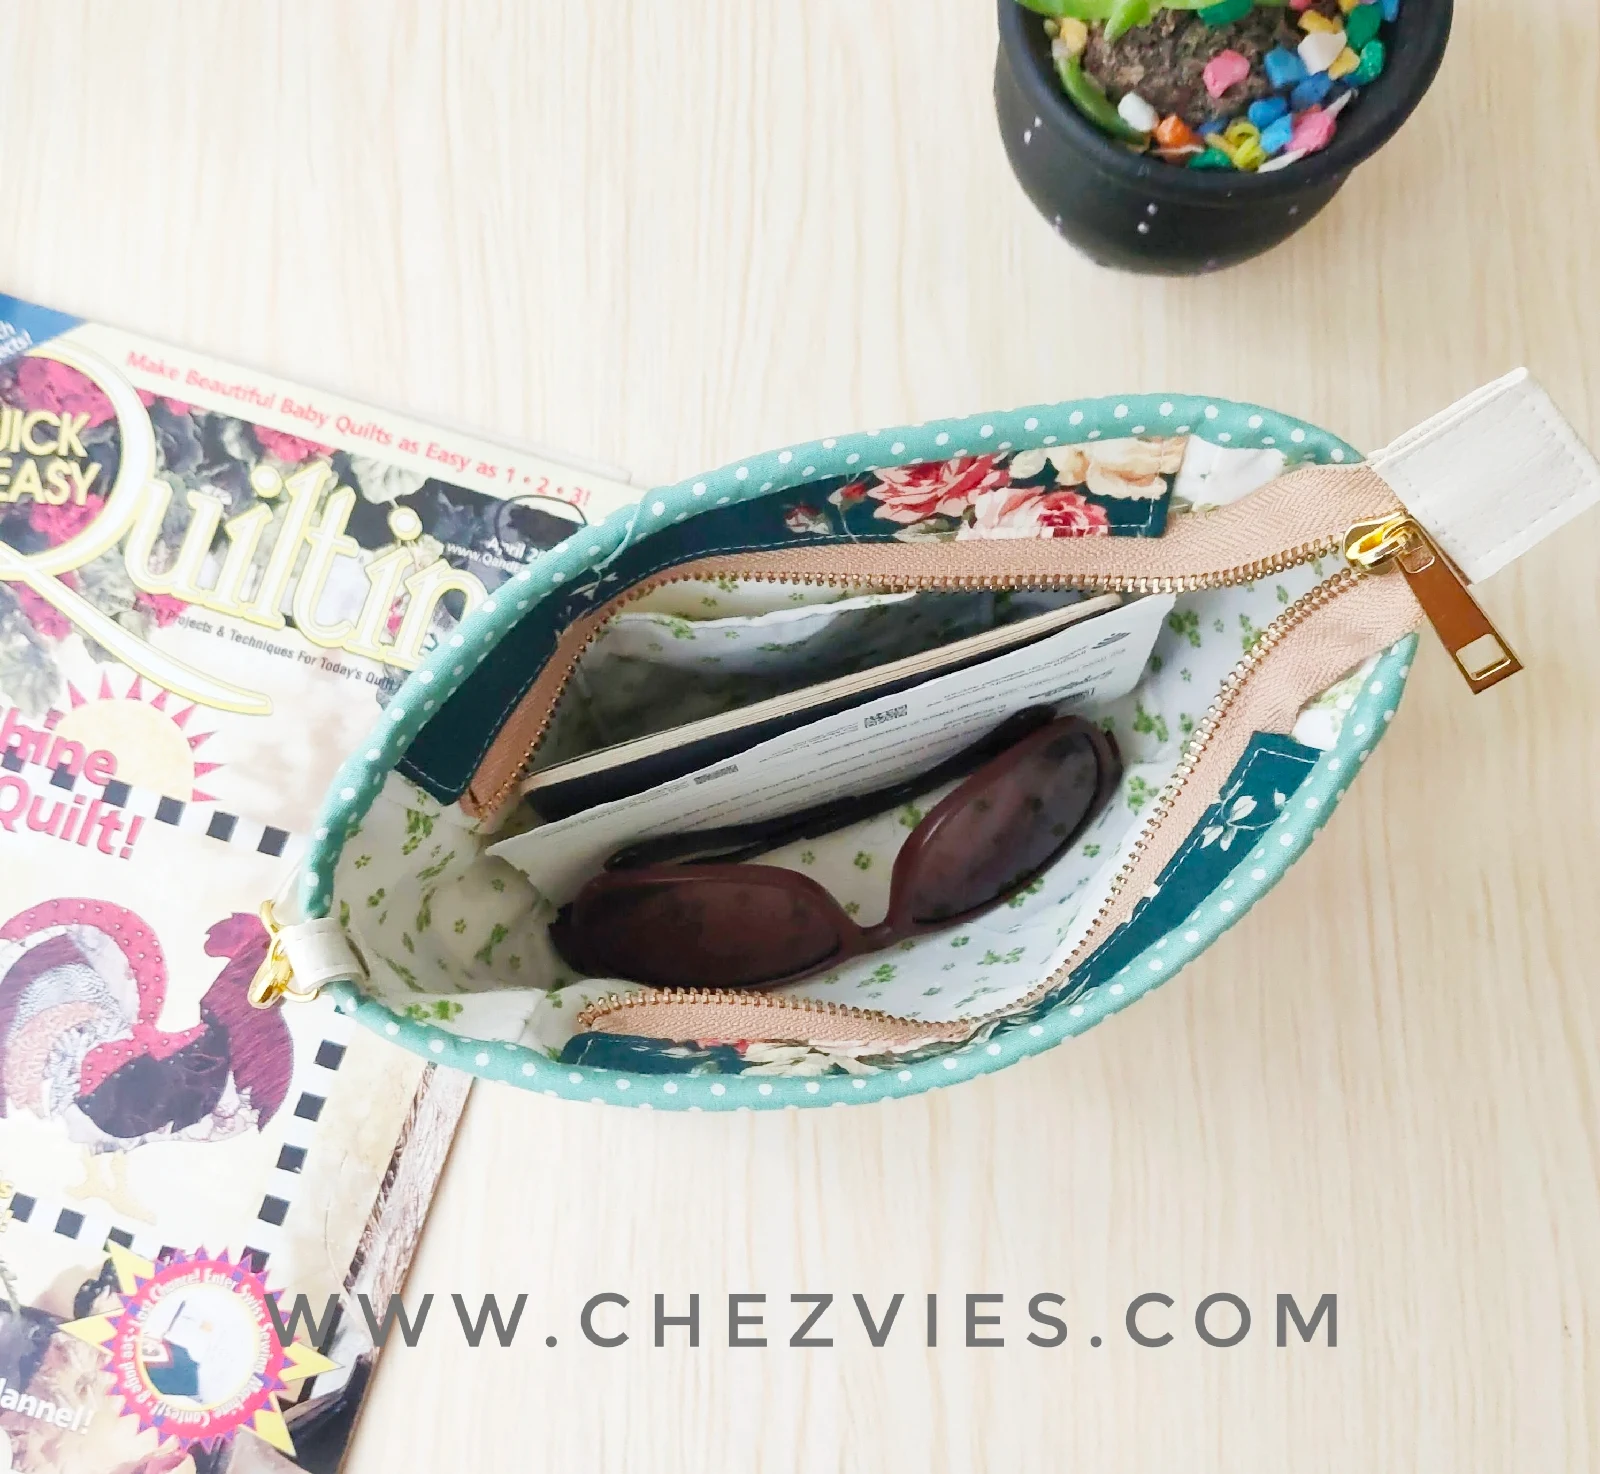
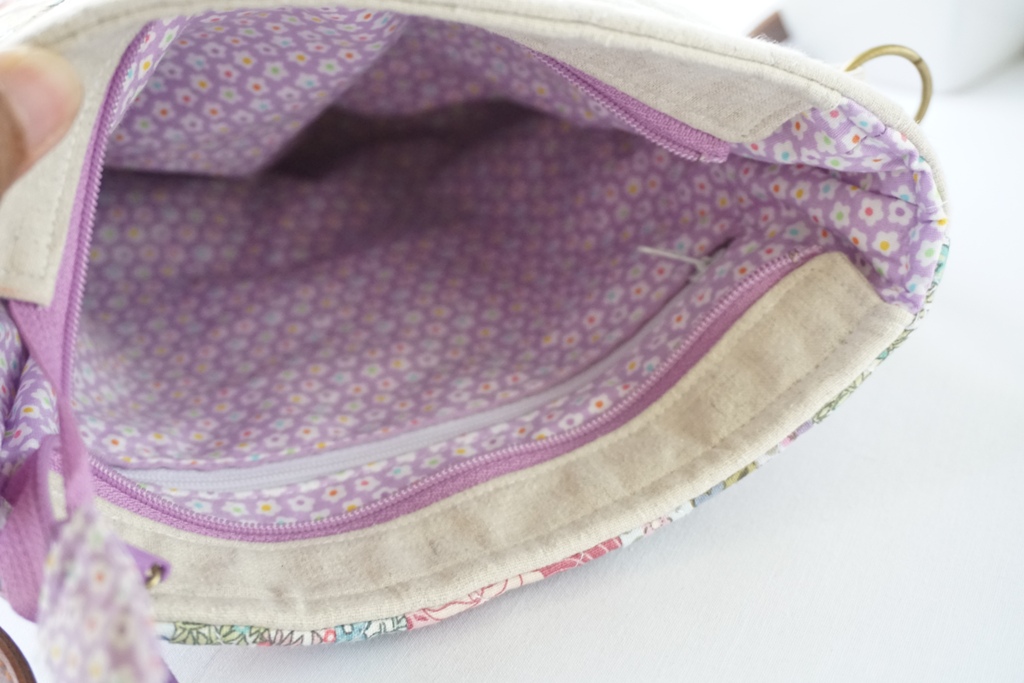
Before going to Indonesia, I managed to finish a quilted handbag. The patchwork was a leftover block from this wall hanging. It was a sudden decision. As usual, before leaving for a holiday I always have this urge to make a few projects. I am glad I did it though. The idea was to make a small sling bag just for a phone and wallet. But since the block was pretty wide, I decided to add a faux leather accent at the bottom. I did not have time to make the handle though. So I just used the handle from another bag! As long as it served the purpose, it's fine. I always prefer a fabric bag as it's lighter and even if you fill it up with lots of stuff, like passport wallets, a cardigan, etc it is still light.


From my sewing room, nothing much has happened. I am still doing whatever I can right now from the corner of my drawing room. I am truly grateful for those who keep supporting my small businesses. I'm happy doing and sharing what I made with all of you.

As we are nearing the end of 2022, I don't really have any resolutions. I guess I will keep doing what I've been doing, maybe working on my Youtube Channel and sharing more tutorials and stories. And writing more on the blog.


Thank you for stopping by today!

Have a nice day!

Elvira


Let's make charming quilted pouch


patchwork bag tutorial
Charming Quilted Pouch (video tutorial)


When Tina Katwal asked me if I'd like to make a quilted pouch tutorial for our Desi Quilters group, I immediately said yes. I was thinking of making one with handloom fabrics as the 7th of this month was National Handloom Day! So it was like serendipity. 

So, I decided to make this pouch or bag using my fave precut - mini charms (2.5" x 25" pieces). To make this bag, you don't need much. 

Materials you need:
20 pieces mini charms of your choice
(40 pieces if you make a patchwork of both sides)
A few Fat Eighth or FQs for Back Panel and lining
Batting (fleece or cotton)
#5 Zipper at least 10" long
(you can use #3 zipper if you wish)
Non-Woven Lightweight Interfacing  
Finished Size 9.5" x 8" (approx)

This patchwork pouch tutorial is for the Love and Healing Swap in our Desi Quilters Group on Facebook. The pattern is for using mini charms but you can easily adapt it using any kind of block or orphan blocks that you have in your UFO baskets. The key is to make the patchwork piece the same size as the interfacing. 
The interfacing will give a perfect finish for the quilted pouch or bag, no matter what batting you're using. I made many patchwork quilted bags and I found this combo is the best. 


Working with handloom fabrics is pretty challenging. If you decided to make one using handloom fabrics, consider prewashing your fabric first. I normally don't ;). As handloom tends to shrink and become out of shame from frequent ironing. Spray starch also helps. 


National Handloom Day


I'm getting a little bit better with the new editing app. I also found a good angle to place my ring light while recording videos :)
Editing does take time but when the mood is good and the boys are happy with Domino's, I can get it done pretty quickly ^^


zipper charms


I hope you enjoy the video! Do let me know in the comment :)
Now, download the pattern below, and let's start sewing those scraps!


Happy Sewing,

Elvira


Chevron Quilted Purse

India

There are a lot of things happened at the end of 2019 around the time when the new pattern Dotty Mini Purse was released. At the time our State was put under curfew for a few weeks with internet ban. I made several things during that time. I even edit it but somehow didn't get posted here on the
Blog.  Well, I guess no internet makes us more productive because we don't have the urge to keep checking our Facebook and Instagram. But this purse happened just before the internet was banned. I was searching for fabric bundles for a makeup bag that Achumi wanted me to make [I'll write that in the next post]. I took out several Quilt Gate bundles which I picked up from Tokyo Quilt Festival in January 2019 (or was it 2018?).

Anyway, I  so wanted to make another Dotty Purse after looking at everyone's photos but wanted to try using a different patchwork block. After browsing through books and magazines (yes real one and not Pinterest!), I settled for chevron block. I used 1.5" strip here and made the block based on Seminole strip piecing. 


I've done this Seminole piecing for the border in THIS QUILT and I really enjoyed piecing the small pieces.  I only did the patchwork for the main panel. I used a bigger print from the bundle for the side panels and love this turned out!! 


Dotty Purse Pattern on Etsy

This purse is really compact but you can fit in quite a lot of stuff there. I also made my own handle using off white vinyl. there was a lot of try and error. The vinyl was leftover from my elder son's project a few years ago. I don't want a stiff handle and since the vinyl is quite soft I tried to add interfacing by iron it on the wrong side using silk setting. It stuck quite well. I cut 2 strips of vinyl ( 0.75" wide by 17" H) and simply sewed them together, then attached the swivel hook on both ends and finished it with rivets! And Tada! my DIY Vinyl bag handle!


Well, that's all the story behind this purse. I am tempted to make more now but I still have few masks and scrubs hats to make. I could not sew for a few days because I got this pain again in my neck and spread to the hand. After 2 days of stretching exercise, I feel much better but I keep taking a break every few minutes.  I really have to start exercise regularly again after Ramzan is over! 

Now lockdown part 4 is going on and our state has few cases every day. Let's pray that the world will heal fast, in the meantime, let's do our best to stay home! Explore your hidden talent so that you won't be bored ^^. 


Take Care & Stay Healthy!


Elvira

New Pattern - Dotty Mini Patchwork Purse and Giveaway Link

Dotty Mini Pure
ETSY  | WEBSHOP

If you love sewing, the chance is you have lots of fabric scraps! Now, here's one pattern that you can make totally from scraps. This Dotty Mini Purse  really need very little  fabrics. Barely one FQ for lining and the rest you can use the scraps. 

Add long strap for crossbody bag

I am a scrap hoarders, as you may see in many of my posts. Scrappy quilts always amaze me and now I can turn them into pretty bags!! Yay! This pattern is super easy that you can get it done in one afternoon (if the family leave you alone :D ). I made 5 so far with denim, linen, yarn dye fabrics, etc. I will share them in my next few posts along with the fabulous talented tester whom without them, this would not be possible! Stay tuned for the tester photos! 

The Dotty Line Up

Truly, writing pattern is not easy. I told Namrata of Bagstock Design, that I wish I paid more attention during the English class LOL. This bag pattern is written in a simple English, that I hope people whose English is not their first language can understand. 
The bag itself is pretty basic. I included basic patchwork piecing technique for those who wants to learn making patchwork/quilt bag. Really, it's not a rocket science. 


The lining is pretty straightforward, with card slot pocket. I took this out several times and got a lot of compliments! 


By the way Sequoia Lynn Sews is going to have sew along in her brand new YouTube Channel and we'll have giveaway on her Blog and Youtube! Be sure you'll check it out. I will re-post it here, once it's live!! So excited!! 

Happy Sewing!

- Elvira -

Read the Review :


Scrappy Patchwork Pouch


Few weeks ago I made few scrappy log cabin blocks and share it in my Instagram. I was cleaning my sewing room and sorting out my scraps and instead of finish my cleaning, I sat down and started making a few blocks.


I really really love scrappy blocks and log cabin is just the easiest. The no rule log cabin blocks!  Since I completed my log cabin quilt I really want to make another one. 


These blocks are 6.5 x 6.5 inches and I really don't have any particular plan. So a few days ago, I made this pouch. Simple flat pouch.


I added a scrap denim which I have in my blue scrap bucket. I love using lightweight fusible interfacing and batting for quilted pouch. They are a perfect combo if you don't have fusible batting. I used fleece batting here. Really, you can use any batting like foam, flannel or even your old fleece blanket. Re-purpose or up cycle is always a good idea!

I used metal zipper this time. I really love the look of it. You can check my IGTV where I show you how to install metal zipper pull. Once you learn the technique, you will love it! 


I made a time lapse video :) I really want to make a proper tutorial video but it needs a lot of preparations and set up. Hopefully later on I can start sharing a better videos. In the meantime, I hope you enjoy this one. (don't forget to share and subscribe :D ) 
The pouch size is 6" x 8" which is a really great size. Just big enough to carry your phone and few stuff. 

Thank you for stopping by.

Happy Sewing!

- Elvira - 

Linky Party
Handmade Monday
Moving it Forward

Handmade monday featured.jpg

Wool Quilt Bag

"Learn to use other’s success as inspiration. Instead of focusing on our failure, we can see their achievement as something to motivate us ~ Twitter "


This is the continuation from my previous Post about the Kits! This wool quilt bag I finished in March. I bought the kits from Country Quilt Market shop in Tokyo.


This patchwork wool bag came with a pre cut wool squares of different textures. The kit didn't include the batting or interfacing and lining. So you have to figure it out yourself. I use a lightweight fusible and add batting for this tote bag.


Since there was no instructions for the lining, I just made it up myself. I added slip pocket and zipper pocket. I thought of using snap button closure as per the pattern but decided to go with zipper. 


Here I learned how to do the bottom and so glad that it lined up beautifully! Working with wool and different textures and weight of fabrics was a challenge. Most of Japanese quilt bags are hand quilted and I was too excited to finish this one. So, I only did quilt in the ditch, just to be on the safe side :D.


And that's me with the bag when I went to Shillong with my SIL in March! 
Now it's my fave tote bag! Nothing like carrying handmade bag ^_^.

What about you? Do you like to buy kits? 

Thank you for stopping by,

Have a nice day,

Elvira


A Kaleidoscope Bag and a Matching Wallet

The best thing about being bag maker is that you can make your dream bag! You can decide every details of the bag, whether you're using your self draft pattern or bought pattern from indie designers. 

In my case, I finally found the bag that is perfect for  me. The Luisa bag pattern from Sotak Handmade. I made the indigo block print bag last week, you can see it HERE and yesterday, I made this Kaleidoscope patchwork version.


I am so in love with this one that I parade it around the house. Today the weather was nice and bright just the perfect time to click few pictures. This patchwork version has different design on each side. 


My BFF Winda gave me the kaleidoscope block kit, I made this pouch earlier and have lots of fabrics left enough to make few more blocks.  


The kaleidoscope pocket is slightly higher than the original pattern but it turned out to be a perfect depth. 


As for the front of the bag, I have this panel fat quarter fabric. I forgot where I got it from but the color is just perfect for it. I must say, this bag is the fastest bag I made, in terms of choosing the fabrics. The grey fabric was also from Winda and the contrast red fabric was a gift from Mbak Tia when she went to Seoul last year. Thank you, girls <3 


And of course I have to make a matching wallet, right? 


A slim and minimalist wallet with 8 card slots and 4 slip pockets. It's based on the Passport Cover Pattern. No zipper pocket though. Now, both are ready for the trip and I better finish my packing! Japan, bring it on!! 

PS: Follow my Instagram for behind the scene stories ;) 

Thank you for stopping by,

Happy Sewing,

~ Elvira~


Linking up to : Show Off Saturday

Patchwork Quilted Cross Body Bag

Hello,


When I went home to Indonesia last July, I bought fabric scraps and lots of them. Hubby and my mom were wondering what I am going to do with the extra baggage. Well, I could not just leave those pretty prints behind, right? 

I've been wanting to make another quilted sling bag after the previous ones, HERE, HERE and HERE

Yesterday, I started to take out my floral scraps and got down to work.  I cut the strip 1" wide and piecing them on my Jack machine. The finished tiny strip blocks are 2 1/8" square. 


I always excited to work with small blocks!! 
The plan was to make 2 big pieces for front and back. Then I changed my mind because I want an exterior pocket. 

Because exterior pocket is always handy, right? I thought of  using magnetic snap as closure but on second thought, it's better using zipper closure. 


On the back is the full patchwork panel! I really love this full panel look! Well, it's always nice to have 2 pretty sides! 


For the side gusset I use the same plain linen as the front panel one. For the sides I just did wavy lines quilting and one the main panels, I did grid quilting. 


When in doubt, grid quilting is always the best choice.


This time, instead of top zipper closure, I did recessed zipper and I am happy that I did! 


I added interior zip pocket too. I thought of adding slip pocket, but after using many sling bags, I found that slip pocket is not really useful (at least for me). I always prefer a simple interior in bags. 


The bag finished at 8"W x 9.5" H x 2" D 
A perfect size for travel cross body bag, right? It can easily fit in the passport covers, wallet, mobile phone and pocket camera.

What do you think?

Thank you for stopping by,

Have a nice day

~ Elvira~ 

Latest Video