Powered by Blogger.
Showing posts with label handmade quilt. Show all posts

Placemats and New Books


Patchwork Placemats


I made more placemats! Not really make a dent in my mini charms bin but I'm pretty happy with how these placemats turned out. Mini charm is my most fave pre-cut and t is also my mood booster. When I don't feel like sewing anything, I just open the mini charms bins and start piecing. 

As I started piecing, all sorts of ideas come into my mind but I decided to make a couple of placemats.  The placemats finished at approximately 12 x 15 inches each. The pink ones are slightly smaller. 

I thought of making all charms for the top, like this one, but decided to make it differently. So I added borders on both sides. For the mustard yellow placemats, I used Indian block print fabric for the patchwork and handloom cotton for the borders. On the back, I used pretty paisley print glace cotton in a matching color and quilted diagonally. It turned out very soft! 


patchwork placemats
Mustard Yellow Placemats


As for the pink placemats, the fabrics are mostly leftover from wallet and bag projects. I used cotton poplin for the borders and the backing. As usual, black and white striped binding when I could not decide what binding to use. 

I love to use these placemats as a center table mat too or to put in my side tables. My MIL used in her dressing tables. They do make the room brighter and I always love to see the quilts being used. 


patchwork quilt placemats
Pink Patchwork Placemats


Patchwork Quilt Placemats
Patchwork Placemats


OK, let's talk about quilting lines. My fave of course is serpentine but sometimes I am just too lazy to set up my HV machine! I always end up using my Jack machine and doing either grid, diagonal, or organic wavy lines. Hmm, it's time to read WALK - Walking foot quilting book by Jacquie Gering again! 

OK, I admit the downside of the digital era is even if you have the books, you  I still first go to Pinterest or Google. 


Recently I bought 2 books! First is Raina Gillman's Create Your Own Improv Quilt which I bought after watching her video on Youtube.  And I am glad I bought it cos there are a lot of basic things to learn from the book. 

The second one is Kaffe Fassett and Liza Prior Lucy's  Shot and Stripes. Well, the book is packed with knowledge. I decided to buy it because I love working with shot cotton fabrics (even though not the Kaffe Fassett brand).


 Sometimes, we see the preview on Amazon and the quilt looks simple and then think "I can do that too" but actually there are a lot of small important details (at least to me)  in the book. However, there are many books that have a preview of attractive projects but very little "educational" information, and some even do not have "proper" tutorials. I feel like this kind of book is only for visual pleasure, which we can freely get from Pinterest or Instagram. What do you think? 

But I still love buying books, especially Japanese Craft or Quilt Books. They have detailed diagrams (which I personally prefer), full-scale patterns, and also additional step-by-step photos. And of course the visuals!

What about you? Do you love buying craft books? Let me know in the comment below! 


Thank you for stopping by!

Happy Sewing

Elvira


*******

Linking up to this wonderful BLOGS

Handmade Happiness 05 - Tutorial Al Qur'an Quilted Cover

Hello and welcome to Handmade Happiness!

Ramadan kareem!
It's almost a week since Ramadan started. Alhamdulillah everything is going on OK here. This year we are fasting for 15 hours in India. I always need a few days to adjust to the new routine. I always reduced my sewing activities during Ramadan so I will probably will not post regularly. We plan to go to Indonesia too after Eid, so I expect until August I won't be posting much.


Today I decided to make a cover for my Qur'an (Islam Holy Book). I wanted a cover that is simple and removable. So here what I did.

First, measure the Holy Book all around including the length of sleeve on both sides. Add 1" to the result for seam allowance.


Mine was 20.5" W x 9.5" H

What you need to cut :

- Exterior Fabric - cut 1
- Lining Fabric - cut 1
- Batting - Cut 1 wider by 1" on all sides.
- Elastic - cut 2 x 9.5" long

Now let's have fun!!

1. Place the wrong side of the exterior fabric on the batting. 


Quilt it as desired. I love doing diagonal pattern.


2. Attach the elastics 5.5" from both of the shorter edges.


3. Place the quilted exterior and lining piece together and sew all around with 1/4" seam allowance. Leave 4" gap or so for turning.


I always cut the corners like this to get a nice corner. Turn the cover inside out.


4. Top stitch all around with 1/8" seam allowance. Make sure the stitch don't go over the elastic.


 Et Voila!! Your easy peasy cover is done. 


It's completely adjustable. Perfect for thin or thick book! 


I tried the cover for a couple of books too and it's perfect. This will also make a quick gift for book lovers.


I hope you enjoy the simple tutorial! 

What about you? Did you make anything that make you happy this week? If so, do link up by clicking the blue button below. If you're not sure what to link up, you can check it HERE

Thank you for stopping by! Let me know if you have any questions or want me to make simple tutorial! 

This post is linked to these wonderful blogs.

Happy Sewing


Scrappy 9 Patch Pillow

Hello,


I mentioned in my previous post about the #100dayproject that is going on in Instagram. I decided to play along and sewing up my scraps, UFOs, and PHDs. 
It feels so rewarding when I able to complete something that has been in my UFOs box. Like these Pillows I made last week. 

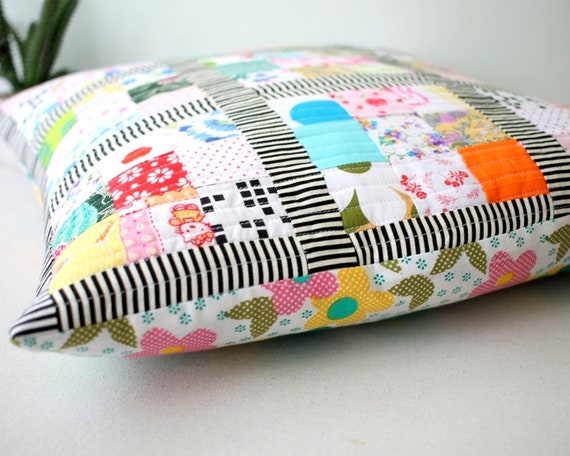
This week, quilty wise I finished this modern 16 x 16 inches scrappy 9 patch cushion cover. 

Scrappy Patchwork Pillow
I have a small jar of 2" squares which I collected for quite sometimes. I made a couple of 9 patch blocks from them. Some of them, I turned it into mug rugs for a swap.  And a few coasters which I gave them away. 

So last week, I decided to make a dent to my 2" jar and started piecing them into 9 patches, while watching my kdramas. Luckily there are so many good korean dramas to keep me company. 

Work in Progress

This patchwork top is totally made of scraps, right down to the black and white stripe borders, which came from my wallet binding scraps. I add sashing to the 9 patched and added long border. I really love this black and white stripe. I will need to get a few yards next time when I go to Indonesia. I used it alot for wallet. When nothing else work, black and white stripe always the solution!


I am using fleece batting for this pillow which I got from Tina of the Square Inch. Quilting it using straight line quilting on my jack sewing machine while watching Love in the Moonlight drama. I know, it's an old one (2016 drama) and I don't usually enjoy period drama, but Park Bo-Gum and Kim Yoo-jung are just too cute together. 


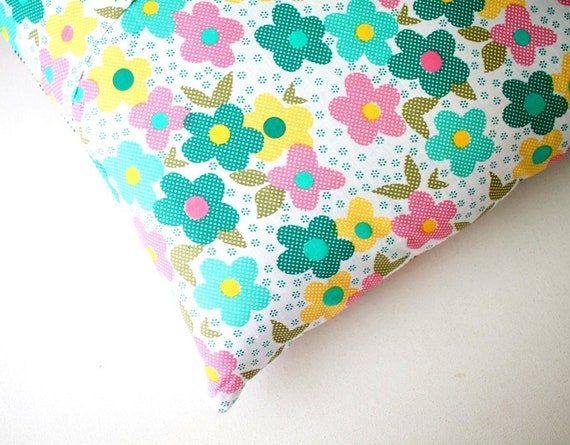
The back of the cushion cover is a colorful floral cotton fabric. I'm glad I saved up the last piece of this fabric, it matched perfectly. 

Envelope Closure

This pillow will make a cute decorative pillow in the living room or a baby room. I added this cushion in my Etsy Shop and also in my Indian WebShop. There are still many scraps I need to sew and I am so excited to sew smaller projects like this. 

Meanwhile, I made a small progress with the scrappy log cabin. I finished 3 color blocks so far. I hope I will be able to add one or two color blocks this weekends. 


Until next time,

Happy Sewing

Linky Party: 

Five Patch Table Runner

Hello,

I have been impressed with the urgency of doing. Knowing is not enough; we must apply. Being willing is not enough; we must do. - Leonardo Da Vinci

This week, I finished another table runner. It's made up from  3 five patch blocks with sashing and border. I used Indian fabrics for this runner because I simply love the colors. I always use spray starch while working with Indian voile fabrics, that way they are easier to sew. I was thinking to give a teal border but after auditioning several fabrics, I decided to go with the white. 

Green table runner

I'm happy with the result. When I work on a quilt, I tend to go with the flow. I don't always have the whole fabric chosen in the beginning. Hence it always takes me a long time to finish even a simple project. 

Reversible Table Decor

As for the backing fabric, I have this perfect green and teal cotton fabric. I really love the color. I quilted the middle block with echo quilting, the idea I get from Leah Day  And the 2 outer blocks, I did a grid line quilting. On the sashing and border, I traced the quilting lines using a scallop ruler. I love result on the reverse side of this table runner. It made the runner a reversible one! 

buffet table decor

I used fleece batting which I got from Tina of TSI . This green table runner finished at 14" x 38" a perfect size for buffet table or center table. 


I finished a couple of mini quilt tops and hopefully able to finish one or two of them next week. Check my Instagram from the behind the scene pictures. 


Thank you for stopping by,
Happy Sewing


Linky Party: 

It's better be late than never

When my bff was having her first baby I told her that I'll make a baby quilt for her. Well, finally I did it...2.5 years later @_@ 

Here it is : 

Pardon the graffiti on the swing..
that was the sons doing when they were on crafty mood. 


Actually I planned a different quilt and then decided to change it midway using completely different fabrics. This one sort of grow from 40" x 40" to 48" x 60" which is - I think - its great for 2 years old. 

I used this soft minty green fabric at the back. One of the reason why it took so long  was looking for the perfect backing. So, it was after my Shillong visit last April that I got this fabric. See, I truly believed that everything happens at its own time and place ;) 


I decided to do straight line quilting using mercerised variegated cotton but it kept breaking. It turned out the thread was old (2009 made) which I didn't check. Lesson learnt.  So, after struggling for few lines I decided to change the thread. Too bad, cos I love the color so much. Well, its not meant to be. 


Another thing was I NEED walking foot. I'm not (yet) comfortable with FMQ -ing big quilt and I love straight line quilting after browsing Pinterest. There's just so much you can do with straight line quilting. HERE is one that I love. And to do that I need the right tool. I'll be getting one soon, thanks to my dear friend who will get it for me ...yay!!  


It's packed and ready to send by Monday. 
Until then

Happy Quilting


Latest Video