Powered by Blogger.
Showing posts with label handmade bag. Show all posts

After a long time


Hello,
It's been a long time! I hope you are all well, happy, and ready for 2023!

-----------------------------------------------------------------

A small announcement!
I recently made some changes to the blog URL. It's been on my mind to do this, to streamline the website. Now https://www.chezvies.com will be the landing page where people can choose where to go from there. The BLOG URL now changed to https://blog.chezvies.com.
I'm still working on changing the backlinks (that is the links that go to my older posts). It will take a while. But just in case you end up with a BROKEN LINK, simply add BLOG. (with "dot) on the URL address on your browser.

For e.g: https://chezvies.com/2017/04/ will result in a broken link, so simply add BLOG. like this https://BLOG.chezvies.com/2017/04

Please bear with me as I am not very savvy. A lot of things have changed and keep changing and I am hardly able to catch up with these technological changes nowadays!

--------------------------------------------------

A lot has happened in the past few months, like my elder son finally settling into college and enjoying his new college life at the University of Bath in the UK. In the past 2 months, he has been learning a lot, from living a sheltered life to living alone, and making new friends in a new country. Adapting to the new environment. It's not easy, especially for 19 year old but as a parent, we are really proud of him, as he evolves to become an independent human being living and adjusting in the new country. Now we can only pray that God will always protect and guide him.


Also, I finally went home to visit my mom and my sisters in October. I went with my younger son and both of us had a nice time in Indonesia, catching up with family and friends. It was really a much-needed trip, especially for me.


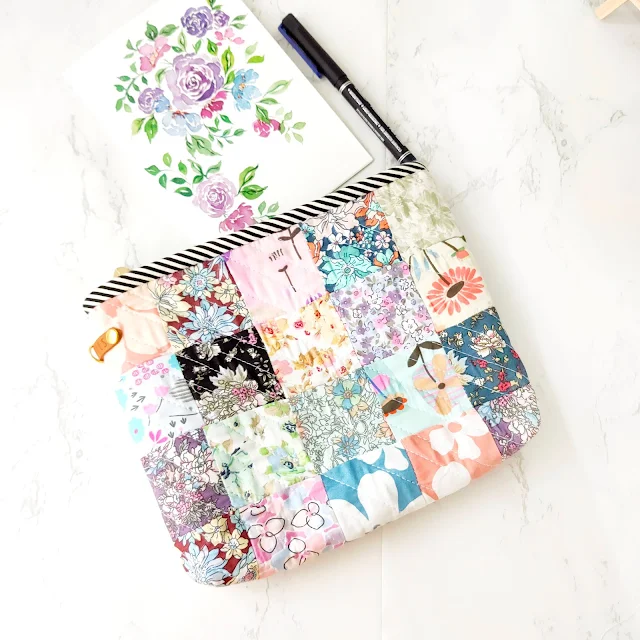
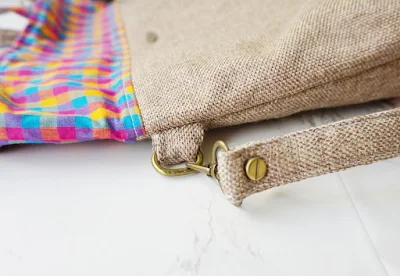
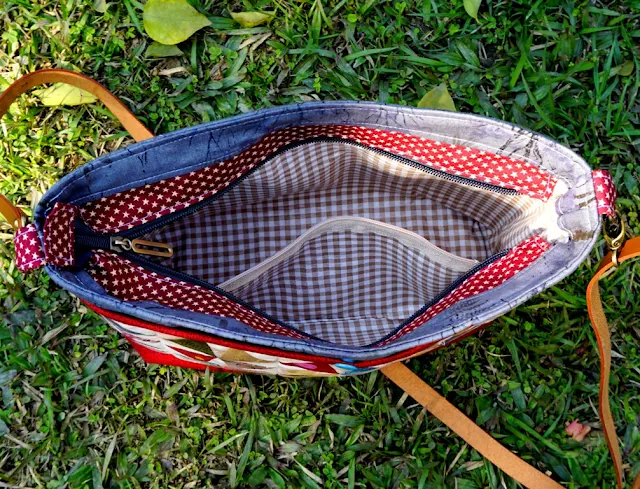
Before going to Indonesia, I managed to finish a quilted handbag. The patchwork was a leftover block from this wall hanging. It was a sudden decision. As usual, before leaving for a holiday I always have this urge to make a few projects. I am glad I did it though. The idea was to make a small sling bag just for a phone and wallet. But since the block was pretty wide, I decided to add a faux leather accent at the bottom. I did not have time to make the handle though. So I just used the handle from another bag! As long as it served the purpose, it's fine. I always prefer a fabric bag as it's lighter and even if you fill it up with lots of stuff, like passport wallets, a cardigan, etc it is still light.


From my sewing room, nothing much has happened. I am still doing whatever I can right now from the corner of my drawing room. I am truly grateful for those who keep supporting my small businesses. I'm happy doing and sharing what I made with all of you.

As we are nearing the end of 2022, I don't really have any resolutions. I guess I will keep doing what I've been doing, maybe working on my Youtube Channel and sharing more tutorials and stories. And writing more on the blog.


Thank you for stopping by today!

Have a nice day!

Elvira


Etsy Cyber Sale

Hello,

Just a quick pop in to let you know that Cyber Sale is now going on across my Etsy Shops! No code necessary.


Here are a few new items I recently added to the shop


available in various sizes

The sale ends on 1st December 2020. 

Thank you for your support!

have a lovely weekends
- Elvira -

Scrappy Patchwork Zipper Bag

Hello,

Patchwork Zipper Pouch


Autumn is here, though we don't have the colorful leaves but the weather is very pleasant. I made few stuff last week, aside from few custom orders. Well, sometimes we have to make time for fun sewing, right?


One was this quilted zipper pouch which I made from scraps. I bought the scraps from Indonesia and the scraps are quite small, around 6" x 18" and some of them are uneven cuts. I cut few of them into 2.5" squares (my fave size) and choosing few dark, medium and light value from the squares. 
Work in Progress

I really love working with small scraps of fabrics and I promised myself that I will make more scrappy projects for myself and also to share with the world :D
I used fun apple print cotton fabric for the lining. It really brighten up the pouch. 


I was going to do the regular zipper top closure, but I want something to zest it up a bit. I have many bias binding from making passport wallets, zipper with binding is the obvious choice! There are 2 ways of attaching the binding that I did. The one like in THIS pouch or THIS one where I attach the binding strip to the main fabric before attaching the zipper.  On this pouch though,  I sewed the zipper first then attach the binding with machine on one side and then finish it with hand sewing. Insha Allah I will make a tutorial when I am working on the next one. 


I did simple diagonal quilting here with the help of  washi tape! Well, I usually just eyeball it though :D. On the other side, I used floral print and quilt it in the same manner. And if you're wondering about the tag which I attached on the side, it was not intentional. The fact is I forgot to attach D ring and had to make an improvisation here. 


 Please let me know what you think in the comment below. Thank you for spending time reading my post, I hope I can inspire you in a small way ^_^.

Happy Sewing,
Elvira


Jute Handloom Foldover Tote Bag

India
Hello 


As an Etsy Seller, my customers are important source of ideas. As they sent me messages on Etsy, we discussed beyond fabric option. Many customers love customized bags and wallets. And thanks to tons of indie bag designers, I can easily find a pattern which my customers may like. Like this foldover tote bag from Sotak Handmade


Originally she wanted a foldover clutch and then after few days she sent me another message that she wanted something bigger than a clutch. She even mentioned the size that she wanted. And as it happened I have this Megan Foldover totebag which I bought when Svetlana was having a sale last year. It was like a yay moment for me, cos then I finally can try this pattern. 


I used jute fabric and handloom fabric here. I simply love the jute fabric! It's thicker than the burlap I have in my shop, it's a home decor weight. I bought it from Shillong 2 years ago. 


The bag came together rather quickly. On the interior, there is one slip pocket. There is one exterior zipper pocket too which is very handy to keep important stuff secured. I used a matching blue poplin cotton fabric and the bag is closed with magnetic snap button. 


Bag Stats : 11" W x 13" H x 4" D

I guess I am going to make another one for my self with a different combination. What say? 

Related links :


Thank you for stopping by,

Have a nice day!

~ Elvira ~


Backpack and Pencil Pouches

When you have nephew who goes to play school, it is mandatory to make him a backpack! Naah...actually this backpack is high on my to do list. 


The pattern is from one of my Japanese book and even though I cannot read Kanji or even hiragana katakana, but somehow I can follow the illustrations. There is one front pocket that close with snap button and I added one zipper pocket inside. 


The backpack is quite spacious to carry the essential stuff like  toys, a book, small water bottle and maybe a pair of change clothes. 


And of course I have to make a matching pencil case for him. I made 2 cases and one is for my other nephew. He loves Japanese manga and her mom told me to make anything with Japan on it. 


So I make one with Shinkasen print fabric. I hope he will like it. The pencil pouch pattern is from Sue Overy on YouTube. There is a link to the main pattern on her channel. 


My youngest sister told me that his son loved the bag! The moment he received the bag, he kept on wearing it! How cute is that!! 


And this pic made my day!! The bag is just perfect for preschoolers!!

What do you think? 

Thank you for stopping by!

Have a nice day ^^

- Elvira - 

A Kaleidoscope Bag and a Matching Wallet

The best thing about being bag maker is that you can make your dream bag! You can decide every details of the bag, whether you're using your self draft pattern or bought pattern from indie designers. 

In my case, I finally found the bag that is perfect for  me. The Luisa bag pattern from Sotak Handmade. I made the indigo block print bag last week, you can see it HERE and yesterday, I made this Kaleidoscope patchwork version.


I am so in love with this one that I parade it around the house. Today the weather was nice and bright just the perfect time to click few pictures. This patchwork version has different design on each side. 


My BFF Winda gave me the kaleidoscope block kit, I made this pouch earlier and have lots of fabrics left enough to make few more blocks.  


The kaleidoscope pocket is slightly higher than the original pattern but it turned out to be a perfect depth. 


As for the front of the bag, I have this panel fat quarter fabric. I forgot where I got it from but the color is just perfect for it. I must say, this bag is the fastest bag I made, in terms of choosing the fabrics. The grey fabric was also from Winda and the contrast red fabric was a gift from Mbak Tia when she went to Seoul last year. Thank you, girls <3 


And of course I have to make a matching wallet, right? 


A slim and minimalist wallet with 8 card slots and 4 slip pockets. It's based on the Passport Cover Pattern. No zipper pocket though. Now, both are ready for the trip and I better finish my packing! Japan, bring it on!! 

PS: Follow my Instagram for behind the scene stories ;) 

Thank you for stopping by,

Happy Sewing,

~ Elvira~


Linking up to : Show Off Saturday

Pattern Testing - Amara Tote Bag


Last week, I finished testing Namrata of Bagstock Design new pattern, Amara Tote & Handbag. 
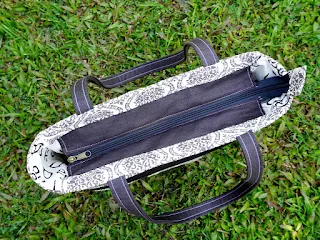
The pattern has 2 sizes and I decided to make the Tote size. I have this pretty linen block print and this is just a perfect project for it. I used black ish denim as contrast. 

image 0
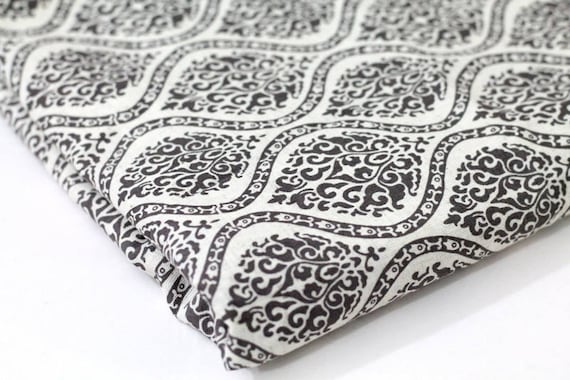
Block Print Linen


Making a big bag always makes me nervous. What if I cut it wrong and I don't have the fabric? And sure enough I cut the back panel wrong this time too!! Luckily I have more than enough fabric to cut another one. 


Amara bag is a breeze to make and Namrata's instruction is always clear with lots of pictures. The many pieces of pattern might be a little intimidating at first, but like a puzzle when everything starts fall into place, you'll feel joy of accomplishment!


I used tamil letters print fabric for the interior which I think matched perfectly. As the contrast I used denim instead of leather. There are plenty room for improvisation if you're a seasoned bag maker. 


The Tote size is very generous and it has plenty interior pockets and one big exterior pockets. The size is perfect for office bag, travel tote or even as diapers bag. 

Amara Tote and Handbag features:
An exterior zipper pocket
Two interior slip pockets
Two interior side slip pockets
Two pen slip pockets inside
An interior zipper pocket
A zip top closure to keep the bag's contents secure

You can get the pattern in Bagstock Designs Website or Etsy

Thank you for stopping by!

Happy Sewing


~ Elvira~

Linky Party:
From Bolt to Beauty

More DIY Block Print Pouches

Hello,

I completed 2 more pouches using the fabric I printed last month. This time I made a medium size zipper pouch and a kindle cover. 

I used indigo processed jute fabric for the combination. I really love the fabric and have been waiting for the perfect project. 

Indigo Bell Kindle Cover

The bells are quite cute, aren't they? I think I may make more in different colors, maybe orange, yellow or green. I already have a red one, which I have not found a perfect match for it. 

Kindle Paperwhite Sleeve

I used my own Kindle Cover pattern  and added a short strap, just long enough to carry it like a purse. The kindle size is the favorite of many, because the size is perfect, for a mini cross body bag, perfect for both adults and children. 


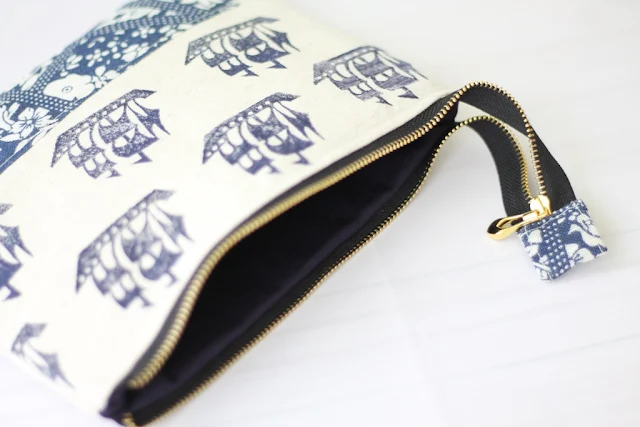
As for the zipper pouch, this time I attached the zipper with reference to Noodle Head Tutorial. I really love the method.


I used a metal zipper. It was a bit fiddly to do the zipper, but I found an effective way to do it. I didn't take any photo, but I promise I will share in my next blog post. 

Sailing Ship Zipper Pouch 


This sailing ship pouch is a bit different than the previous large pouches. In this one, I used batting which I ordered from Tina of The Square Inch. Tina was kind enough to send me samples of the battings that are available. I chose 3 different battings. This one I used the 150 gsm polyester fleece batting and I really love the result. It's firm and gives enough cushioning so that one can keep gadgets in it. 


It's been fun and productive week for me. What about you? What have you been working on?

Until then,

Happy Sewing


Latest Video