Powered by Blogger.
Showing posts with label DIY. Show all posts

Block Print DIY

Hello,

Do you remember this song?

"Celebrate don't you wait, never hesitate
Celebrate while you still got time

Celebrate, yeah it's great, do it right away

Turn your back it's celebration time"


Well, today I decided I will try the block printing!! Afterall I got the wooden blocks and fevicryl fabric paints a few months ago. 
I saw this tutorial on youtube (it's in Hindi) and decided to try it. And I did! 


So, here's few things I learned:

1. First, soak the wooden blocks in a cooking oil. She suggested til ka tel a.k.a sesame oil. I used whatever  I have in the kitchen. she suggested to soak overnight, I soaked for about 3 hours or so. 


2.  While the wooden blocks are being soaked,  wash the fabric that you are going to use. I used linen, the lady in the video used mulmul or voile cotton. 
After the fabric dried up ironed it nicely. I used layers of newspaper and flannel fabric as a base and laid out my piece of fabric there.


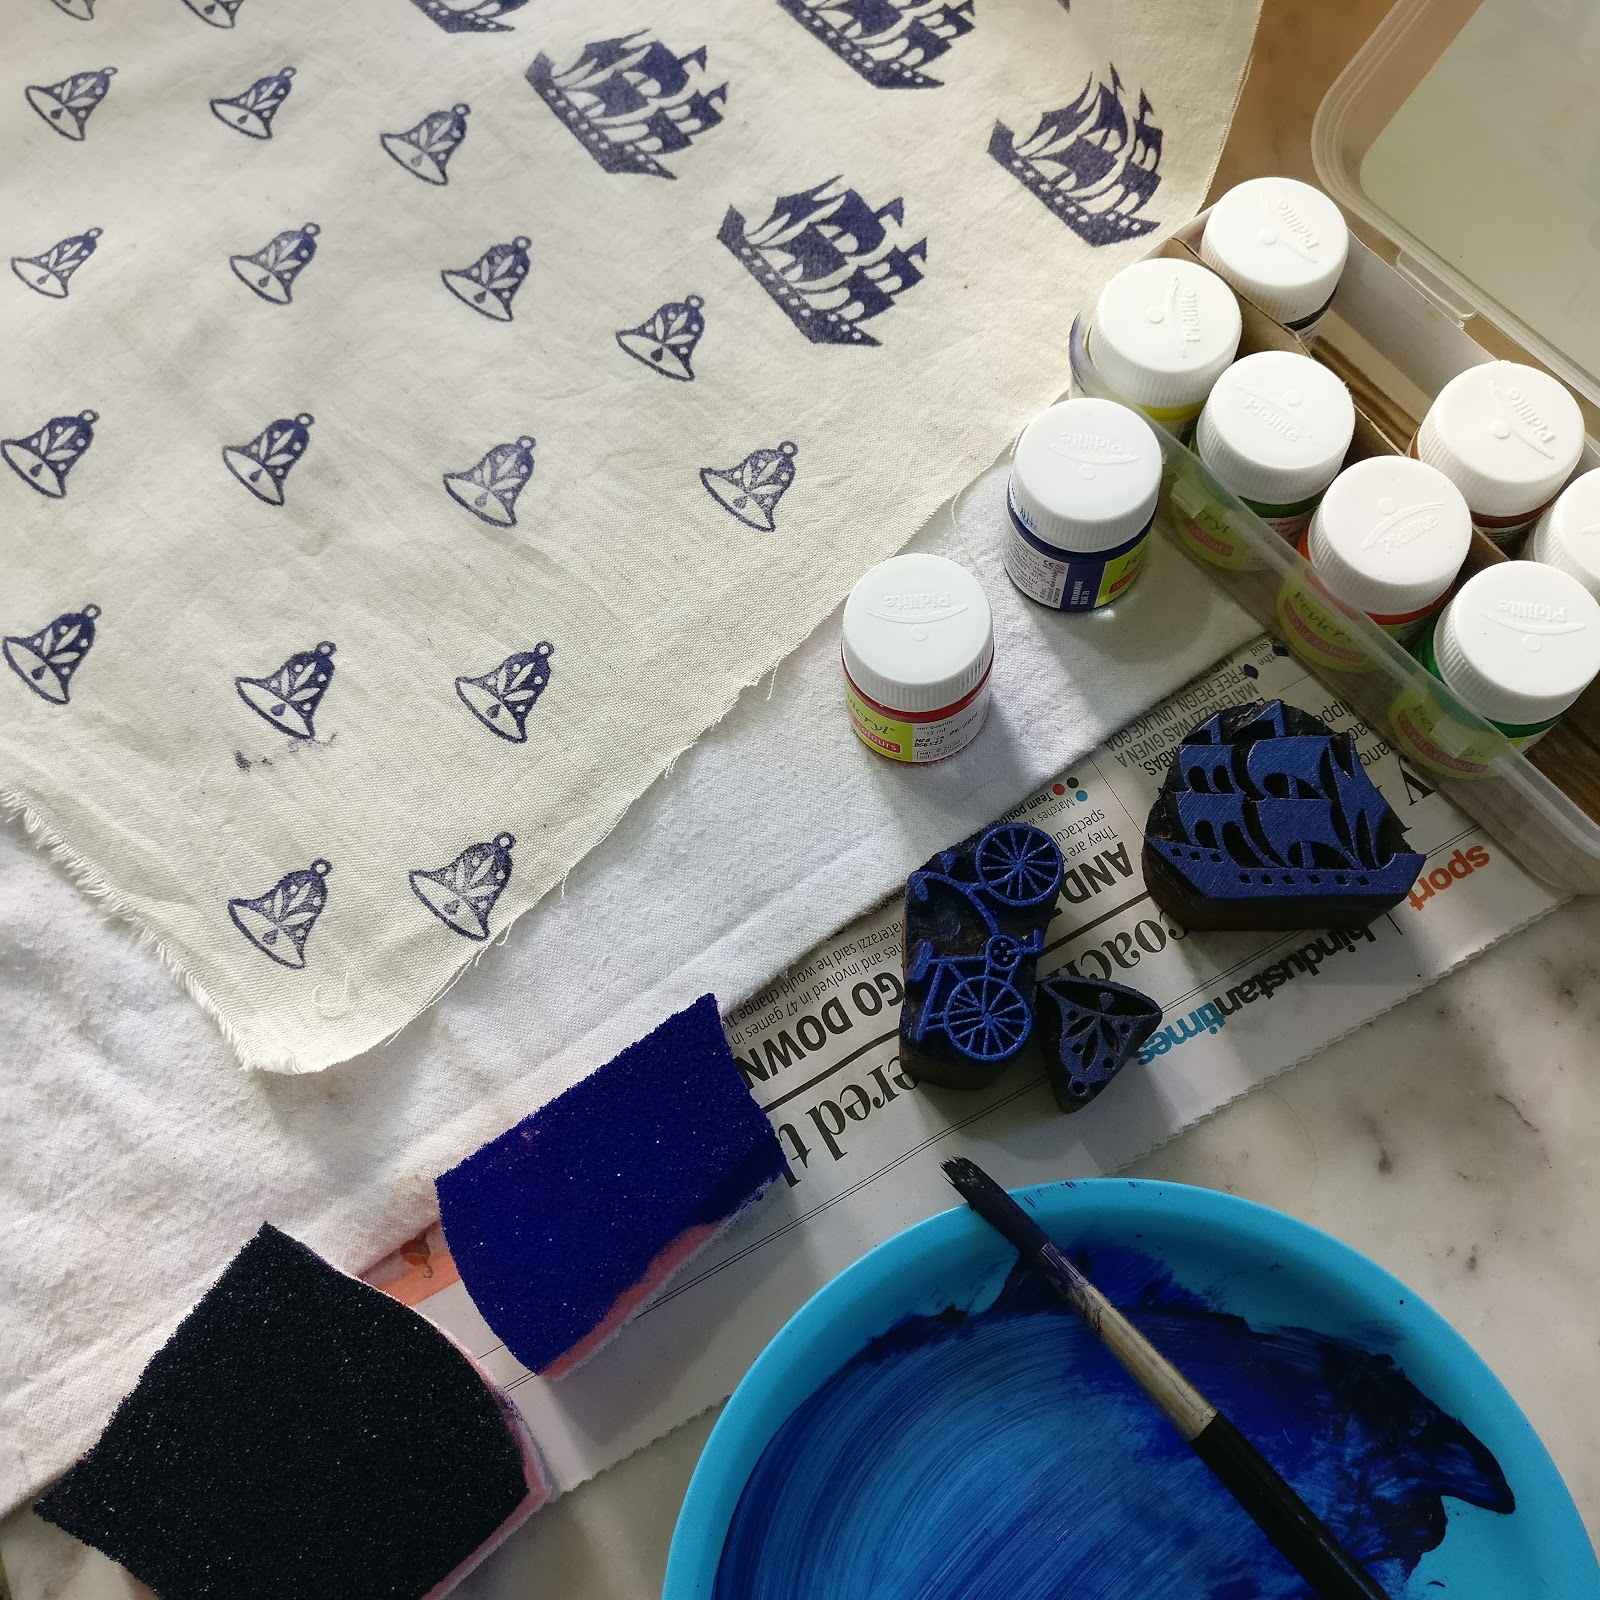
3. Now, take one kitchen scrubber, the sponge one, and a small plate to mix the colors. Transfer the paints onto the sponge. Wipe the wooden block with a paper towel first then press it onto the sponge and start stamping. One at a time. 

And here is the result.
 I love this bicycle print. 

 The Ship and Bell, more or less the same size as the bicycles. 


and I love the red florals and bells here. 

Now, I have to wait for 24 hours before I can sew them into something pretty. A wallet, sling bag, or maybe a pouch

If you ask where do I get the wooden block from? I bought it from Amazon India. There are lots of sellers who sell them in a set of few pieces. I think I am going to buy one more set. It's kind of fun. I will let you know how it is after 24 hrs. Subscribe to my blog if you don't want to miss the post. 

Yes, it's a small achievement today that worth celebrating. 
It was not perfect but then that's the beauty of handmade, right?

Until then,

Happy Diwali!!


Show Off Saturday : Little Pouches and Recycle boxes

I have finished these few things after I came back from the holiday.  I bought quilted purse pattern from etsy and love it. 

This is for my SIL


and I keep this for my self ^^

And I was in a recycling mood, so covered these mug boxes with fabrics and reuse the panda plastic bottle which we got from Singapore Zoo to keep my wooden buttons.


I used the boxes to keep my binding strips. 

I especially like the pin cushion. I got the idea from pinterest about re using the cello tape tube as pin cushion


Isn't that cute?


=== This post is linking to Show Off Saturday ===


until then....


DIY Labels

I got this Iron-on Transfer paper which I always wanted to have from my BIL in Indonesia. I've been wanting to try the fabric label like I saw in Patchwork Pottery's Tutorial few months back. Finally, yesterday I got the chance to try it after my DH bought me a canon pixma ink jet printer...Thank you so much, dear..:). The printer worked wonderfully. In fact, I tried both using my friend, Agnes' design and I tried the plain letter one.
 I love the colored ones (though I should have made it bigger). It turned out very clear and I iron it on a plain  cotton fabric and know what..after I cut it, the fabric don't fray...yay!!!..


Second one, I used the plain letters "chez vies" and I iron it on  grosgrain ribbon. The mistake I made here is I cut the strips too narrow. Well the letter perfectly fit in the middle part of the ribbon but I should have cut it about 1' wide. Lesson learnt!


Another lesson I learn is that while ironing, DO NOT move your iron (like when you're ironing). Just press it firmly on the design. Otherwise it will smudge.


Now let's get down making something and start using those labels...:)

Happy Crafting


DIY Quilting Rulers and a runner

I made my own DIY quilter's ruler. All these time whenever I want to do some patchwork projects I  measure the fabric manually, mark it, draw the line  and cut it. It takes such a long time which sometimes discourage me. I've been searching for one here in my town and asking my friends who lived in the bigger city but couldn't find it. So I tried many methods like using a card board but the problem is you can't see through it and sometimes it's end up all wonky :P.

So, I made my own from a thick transparent plastic cover from my old diary.


I carefully measure it 5" x 5" and cut it. Then I mark the grid 1/2" apart and voila my quilting ruler is ready.


Though I' m still using the pencil & scissor but at least it makes my work faster LOL. I know I could buy the rotary cutter from the net, but again I'm not sure whether it's allowed or not by the India Post. And searching though Ebay India is also NIL...:S.

And here's what I made :


I used South Indian handwoven cotton. I love the south Indian cotton cos it has bright & deep colors. I collected quite few pieces and been wanting to do something with it. It's a simple one with no batting (which is another problem for me cos I don't find any retailer...considering Indian quilt is so popular). I used a thicker handwoven fabric for the backing. It has stripes with mix color thread which suit the top.

And now I'm working on a pinwheel design. I think it's going to be another runner maybe I'll use flannel for the batting. What say, ladies?


Latest Video